
Thay đổi con trỏ chuột trong Windows 7 - Đây là cách
Đọc mẹo thực tế này về cách thay đổi con trỏ chuột của bạn trong Windows 7.
Thay đổi con trỏ chuột một cách trực quan trong Windows 7
- Nhấp vào biểu tượng "Bắt đầu" hoặc "Windows" và sau đó vào "Bảng điều khiển".
- Bây giờ chọn danh mục "Phần cứng và Âm thanh".
- Trong "Thiết bị và Máy in", nhấp vào "Chuột" để mở cài đặt chuột.
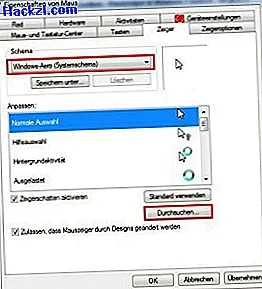
- Một cửa sổ gọi là "Thuộc tính của chuột" mở ra. Chuyển đến tab "Con trỏ" ở trên.
- Trong "Lược đồ", về cơ bản bạn có thể thay đổi giao diện của con trỏ chuột. Ví dụ, con trỏ chuột có thể được phóng to bằng, ví dụ, chọn sơ đồ "Windows Aero (lớn) (sơ đồ hệ thống)".
- Trong menu cuộn của "Tùy chỉnh:" bạn có thể thay đổi con trỏ chuột cho mỗi lệnh. Để thực hiện việc này, trước tiên, nhấp vào lệnh và sau đó vào "Duyệt ..." và chọn con trỏ mong muốn bằng cách nhấp vào "OK".
- Lưu các thay đổi bằng cách nhấp vào "Áp dụng".
- Nhấp vào "Sử dụng mặc định", đặt lại tất cả các thay đổi về cài đặt gốc.
"CthonFX" cung cấp cho con trỏ chuột của bạn nhiều hơn nữa
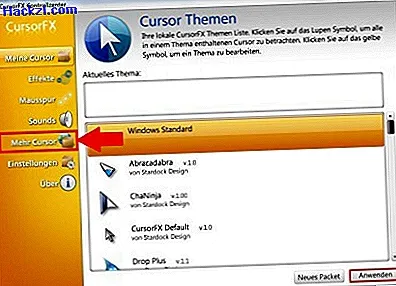
Với công cụ "CthonFX" miễn phí, bạn có thể dễ dàng tải xuống các con trỏ chuột mới và kích hoạt chúng trực tiếp trong chương trình.
- Cài đặt chương trình "CthonFX" và khởi động nó sau khi cài đặt.
- Các con trỏ chuột đã được cài đặt được hiển thị trên "Con trỏ của tôi". Bằng cách nhấp vào "Thêm con trỏ", bạn có thể tải xuống các con trỏ chuột thú vị hơn từ trang nhà phát triển.
- Với một cú nhấp chuột vào "Áp dụng", bạn thay đổi con trỏ chuột.
Đọc ở đây làm thế nào để thay đổi nền máy tính của bạn.