
Ubuntu: thiết lập máy in - cách thức hoạt động
Mẹo thực tế này chỉ cho bạn cách thiết lập máy in của mình trong Ubuntu. Phiên bản Linux thân thiện với người dùng sẽ tự động cài đặt hầu hết các trình điều khiển máy in ngay khi bạn được kết nối với Internet. Chúng tôi sẽ giải thích cách thêm, xóa và quản lý máy in.
Linux: Thiết lập máy in trên Ubuntu
Theo mặc định, hệ điều hành Ubuntu nhận ra máy in của bạn. Bạn thiết lập nó bằng các bước sau.
- Kết nối máy in với thiết bị của bạn qua USB và khởi động máy in.
- Mở cài đặt hệ thống và điều hướng trong phần "Phần cứng" đến mục menu "Máy in".
- Chọn "Thêm".
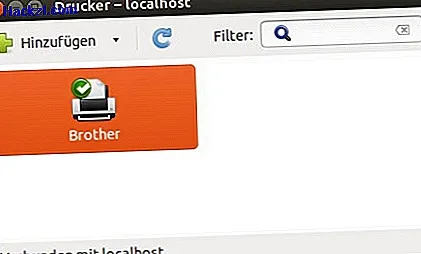
- Trong "Thiết bị", bạn sẽ tìm thấy tên chính xác của máy in của mình.
- Chạm vào "Tiếp theo".
- Quyết định các trình điều khiển thích hợp từ cơ sở dữ liệu. Nếu trình điều khiển chính xác không có trong đó, hãy tải xuống từ trang web của nhà sản xuất và chọn "Cung cấp tệp PPD" thay vì "Chọn trình điều khiển từ cơ sở dữ liệu".
- Sau đó, bạn có thể thay đổi tên máy in và mô tả trong Ubuntu.
- Xác nhận với "Áp dụng".
- Nếu cần, chọn "In trang thử nghiệm".
Ubuntu: Thiết lập và tùy chỉnh máy in
Bây giờ bạn đã cài đặt thành công máy in của bạn.
- Trong cài đặt hệ thống, bạn sẽ tìm thấy thiết bị của mình trong "Máy in".
- Nếu bạn muốn xóa máy in, nhấp chuột phải vào tên và chọn "Xóa".
- Bạn mở thuộc tính máy in bằng cách nhấp chuột phải vào tên và sau đó chọn "Thuộc tính".
- Trong menu hiện đang mở, bạn có thể xem trạng thái máy in và hàng đợi in, nhả máy in và điều chỉnh nạp giấy.

Video âm nhạc: Linux giúp bạn giải phóng
Các hướng dẫn mô tả một giải pháp trong Ubuntu 14.04 LTS. Một bài viết khác sẽ cho bạn biết cách sử dụng trình điều khiển Windows trên Ubuntu.